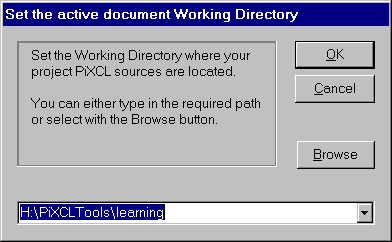
| When you start a PiXCL development project, the first thing you need to do is
set a working file directory, by clicking on either the Working Directory button, or selecting the Files: Set Working Directory menu item.
|
 Click the OK button when done you are now ready to start coding a new file, or
open an existing PXL file or files.
To create a new and fully functional skeleton source file, you may find that
the cre8tapp.exe Helper will save you lots of time. It is installed as the default Helper
App#2. The PiXCL source code cre8tapp.pxl is supplied in the ..\samples directory so you can see how it works, and modify it to suit your own needs.
See also Setting Optional Tool Preferences